
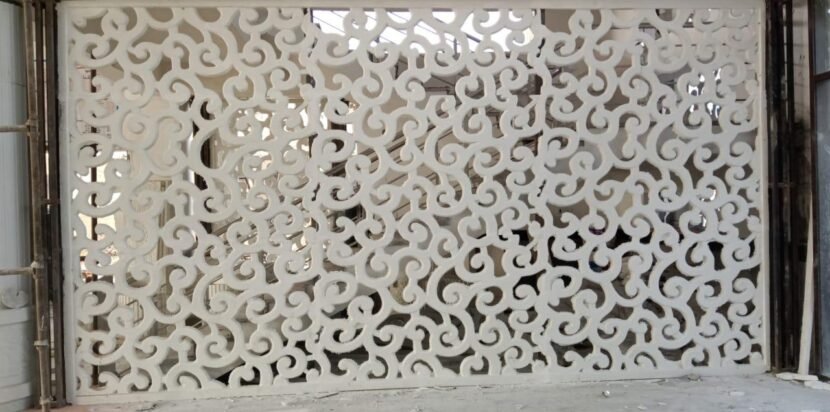
Glass Fibre Reinforced Concrete (GRC) Jali, also known as GFRC Jali, is a popular architectural element that combines aesthetic appeal with functionality. These intricate lattice screens provide ventilation, privacy, natural light filtration, and decorative enhancement to facades, windows, balconies, partitions, and interiors. Made from a composite of cement, fine aggregates, alkali-resistant glass fibres, and additives, GRC Jali is lightweight, durable, weather-resistant, and easier to install compared to traditional RCC or stone jalis.
Proper installation is essential for ensuring structural integrity, longevity, and visual alignment. This guide provides a detailed, step-by-step process tailored for builders and architects, based on standard industry practices.
Tools and Materials Required
Before starting, gather the following:
- Measuring tape, spirit level, and plumb line for accuracy.
- Drill machine with masonry and concrete bits.
- Rust-proof fasteners (stainless steel or galvanized bolts, screws, anchors, brackets).
- Metal framework (MS angle, aluminum sections, or wooden supports – preferably rust-proof).
- Cement grout, silicone sealant, or epoxy adhesive.
- Safety gear (gloves, goggles, masks).
- Optional: Expansion joint materials for large panels, weather-resistant paint or coating.
Step-by-Step Installation Process
Step 1: Site Preparation and Assessment
- Inspect the installation site thoroughly. Ensure the supporting structure (wall, column, or frame) is level, plumb, and structurally sound to bear the weight of the GRC Jali panels.
- Verify dimensions: Compare the GRC Jali panels against architectural drawings for size, pattern, and alignment.
- Clean the surface: Remove dust, debris, or loose material from the mounting area.
- Mark positions: Use a chalk line or marker to outline where the jali will be fixed, ensuring perfect alignment for multiple panels.
Step 2: Install Supporting Framework
- For most installations, a sturdy sub-frame is recommended to distribute load evenly and provide secure fixing points.
- Fix a metal (MS or aluminum) or wooden framework to the wall/structure using anchors or bolts. Ensure it is rust-proof, especially for exterior applications.
- The framework should be securely anchored with expansion bolts or chemical anchors into the base structure (RCC wall, column, etc.).
- Use a spirit level to confirm the frame is perfectly horizontal and vertical.
Step 3: Marking and Drilling
- Position the GRC Jali panel against the framework.
- Mark drilling points on both the panel and the framework, following the pre-designed fixing locations (usually at corners and mid-points for even support).
- Drill holes in the GRC panel carefully using a suitable bit – avoid excessive force to prevent cracking, as GRC can be fragile during handling.
- Correspondingly, drill into the framework or wall for anchors.
Step 4: Fixing and Anchoring
- Align the panel precisely on the framework.
- Secure the jali using rust-proof bolts, screws, brackets, or stainless steel fixtures. Tighten fasteners gradually to avoid stress concentration.
- For added stability, especially in larger panels, use multiple fixing points (typically 4-8 per panel depending on size).
- Ensure even spacing and pattern continuity if installing multiple panels side-by-side.
Step 5: Sealing and Jointing
- Fill any gaps between the jali, framework, and wall with cement grout, silicone sealant, or epoxy to prevent water ingress and enhance stability.
- For large or exterior installations, incorporate expansion joints to accommodate thermal movement and prevent cracking.
- Seal joints between adjacent panels with flexible sealant for weatherproofing.
Step 6: Finishing and Cleanup
- Apply a weather-resistant coating or paint if specified in the design (GRC can be pre-finished or painted on-site).
- Clean the surface to remove dust, grout residue, or marks.
- Conduct a final inspection for alignment, stability, and aesthetic finish.
Precautions and Best Practices
- Handling: GRC panels are lightweight but brittle – use multiple people for lifting larger panels and avoid dropping or bending them.
- Professional Help: For complex or large-scale projects, engage experienced installers familiar with GRC to ensure precision and safety.
- Load Consideration: Confirm the supporting structure can handle the load; GRC is lighter than traditional materials but still requires adequate support.
- Weather Conditions: Avoid installation in extreme weather; sealants and grouts need proper curing time.
- Maintenance: Post-installation, periodic cleaning and inspections will maintain appearance and durability.
Comments are closed